Here is how I setup duplicity to use S3 as a backend while giving duplicity the minimum set of permissions to my Amazon Web Services account.
AWS Security Settings
First of all, I enabled the following general security settings in my AWS account:
- MFA with a U2F device
- no root user access keys
Then I set a password policy in the IAM Account Settings and turned off all public access in the S3 Account Settings.
Creating an S3 bucket
As a destination for the backups, I created a new backup-foobar S3
bucket keeping all of the
default options except for the
region
which I set to ca-central-1 to ensure that my data would stay in
Canada.
The bucket name can be anything you want as long as:
- it's not already taken by another AWS user
- it's a valid hostname (i.e. alphanumeric characters or dashes)
Note that I did not enable S3 server-side encryption since I will be encrypting the backups client-side using the support built into duplicity instead.
Creating a restricted user account
Then I went back into the Identity and Access Managment
console and created a new
DuplicityBackup policy:
{
    "Version": "2012-10-17",
    "Statement": [
        {
            "Sid": "VisualEditor0",
            "Effect": "Allow",
            "Action": [
                "s3:PutObject",
                "s3:GetObject",
                "s3:ListBucketMultipartUploads",
                "s3:AbortMultipartUpload",
                "s3:CreateBucket",
                "s3:ListBucket",
                "s3:DeleteObject",
                "s3:ListMultipartUploadParts"
            ],
            "Resource": [
                "arn:aws:s3:::backup-foobar",
                "arn:aws:s3:::backup-foobar/*"
            ]
        },
        {
            "Sid": "VisualEditor1",
            "Effect": "Allow",
            "Action": "s3:ListAllMyBuckets",
            "Resource": "*"
        }
    ]
}
It's unfortunate that the unrestricted s3:ListAllMyBuckets permission has
to be granted, but in my testing, duplicity would error out without it. No
other permissions were needed.
The next step was to create a new DuplicityBackupHosts IAM group to which
I attached the DuplicityBackup policy.
Finally, I created a new machinename IAM user:
- Access: programmatic only
- Group:
DuplicityBackupHosts - Tags:
duplicity=1
and wrote down the access key and the access key secret.
Duplicity settings
I installed duplicity like this:
apt install duplicity python3-boto3
then used the following option:
--s3-use-ia: recommended pricing structure for backups
and the following remote URL:
boto3+s3://backup-foobar/machinename
I ended up with the following command:
http_proxy= AWS_ACCESS_KEY_ID=<access_key> AWS_SECRET_ACCESS_KEY=<access_key_secret> PASSPHRASE=<password> duplicity --s3-use-ia --no-print-statistics --verbosity 1 --exclude-device-files --exclude-filelist <exclude_file> --include-filelist <include_file> --exclude '**' / <remote_url>
where <exclude_file> is a file which contains the list of paths to keep
out of my backup:
/etc/.git
/home/francois/.cache
<include_file> is a file which contains the list of paths to include
in the backup:
/etc
/home/francois
/usr/local/bin
/usr/local/sbin
/var/log/apache2
/var/www
and <password> is a long random string (pwgen -s 64) used to encrypt the backups.
Backup script
Here are two other things I included in my backup script prior to the actual backup line listed in the previous section.
The first one deletes files related to failed backups:
http_proxy= AWS_ACCESS_KEY_ID=<access_key> AWS_SECRET_ACCESS_KEY=<access_key_secret> PASSPHRASE=<password> duplicity cleanup --verbosity 1 --force <remote_url>
and the second deletes old backups (older than 12 days in this example):
http_proxy= AWS_ACCESS_KEY_ID=<access_key> AWS_SECRET_ACCESS_KEY=<access_key_secret> PASSPHRASE=<password> duplicity remove-older-than 12D --verbosity 1 --force <remote_url>
Feel free to leave a comment if I forgot anything that might be useful!
Up until recently, it was a pain to defend againt WPA2 brute-force attacks by using a random 63-character password (the maximum in WPA-Personal) mode). Thanks to Android 10 and iOS 11 supporting reading WiFi passwords from a QR code, this is finally a practical defense.
Generating the QR code
After installing the qrencode
package, run the following:
qrencode -o wifi.png "WIFI:T:WPA;S:<SSID>;P:<PASSWORD>;;"
substituting <SSID> for the name of your WiFi network and <PASSWORD> for
the 63-character password you hopefully generated with pwgen -s 63.
If your password includes a semicolon, then escape it like this:
"WIFI:T:WPA;S:<SSID>;P:pass\:word;;"
since iOS won't support the following (which works fine on Android):
'WIFI:T:WPA;S:<SSID>;P:"pass:word";;'
The only other pitfall I ran into is that if you include a trailing newline
character (for example piping echo "..." into qrencode as opposed to
echo -n "...") then it will fail on both iOS and Android.
The full syntax for these WiFi QR codes can be found on the zxing wiki.
Scanning the QR code
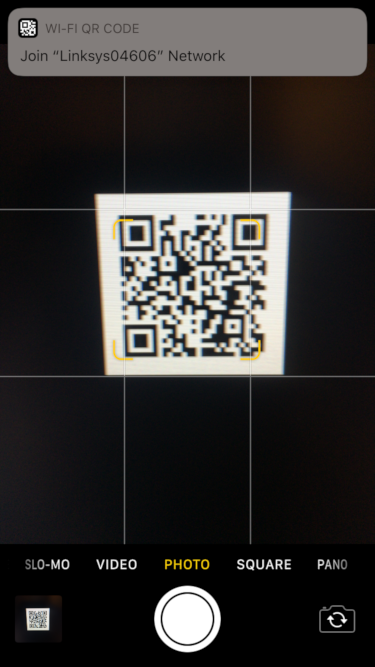
On iOS, simply open the camera app and scan the QR code to bring up a notification which allows you to connect to the WiFi network:
On Android, go into the WiFi settings and tap on the WiFi network you want to join:
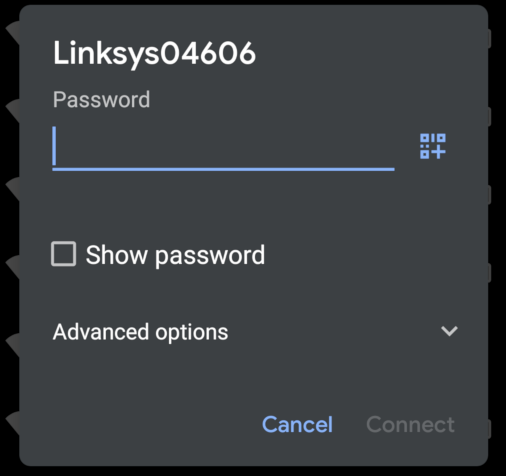
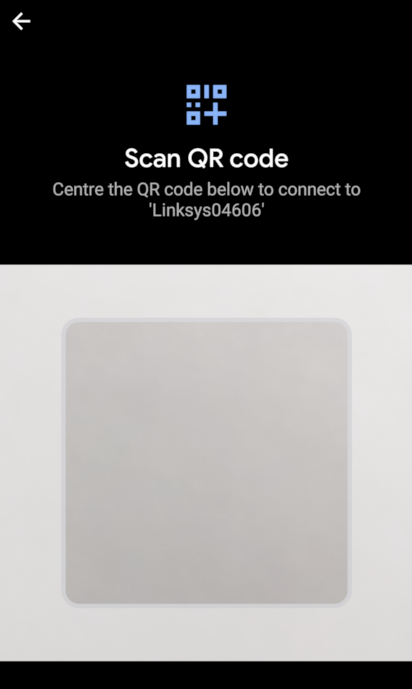
then click the QR icon in the password field and scan the code:
In-browser alternative
If you can't do this locally for some reason, there is also an in-browser QR code generator with source code available.